Introduction
Today, I'll be demonstrating the Exam Results module — used by teachers and administrators to enter student marks, calculate grades automatically, and prepare results for publication.
This module ensures accurate grading, transparent reporting, and reliable academic records.
📍 Navigating to Exam Results
To access this feature:
Go to Examinations in the sidebar
Then select Results
This is the central area where all examination scores are recorded and managed.
🖥️ Results Entry Interface Overview
The results entry interface allows you to:
Select the examination, class, section, and subject
Enter marks for all students
View grades calculated automatically
Add remarks for individual students
🔍 Selecting Filters for Results Entry
To begin entering results:
| Step | Action |
|---|---|
| 1 | Select the examination you are working on |
| 2 | Choose the class |
| 3 | Choose the specific section |
| 4 | Select the subject for which marks will be entered |
| 5 | Click Load Students |
The system then displays the list of students enrolled in that class and subject.
✏️ Entering Student Marks
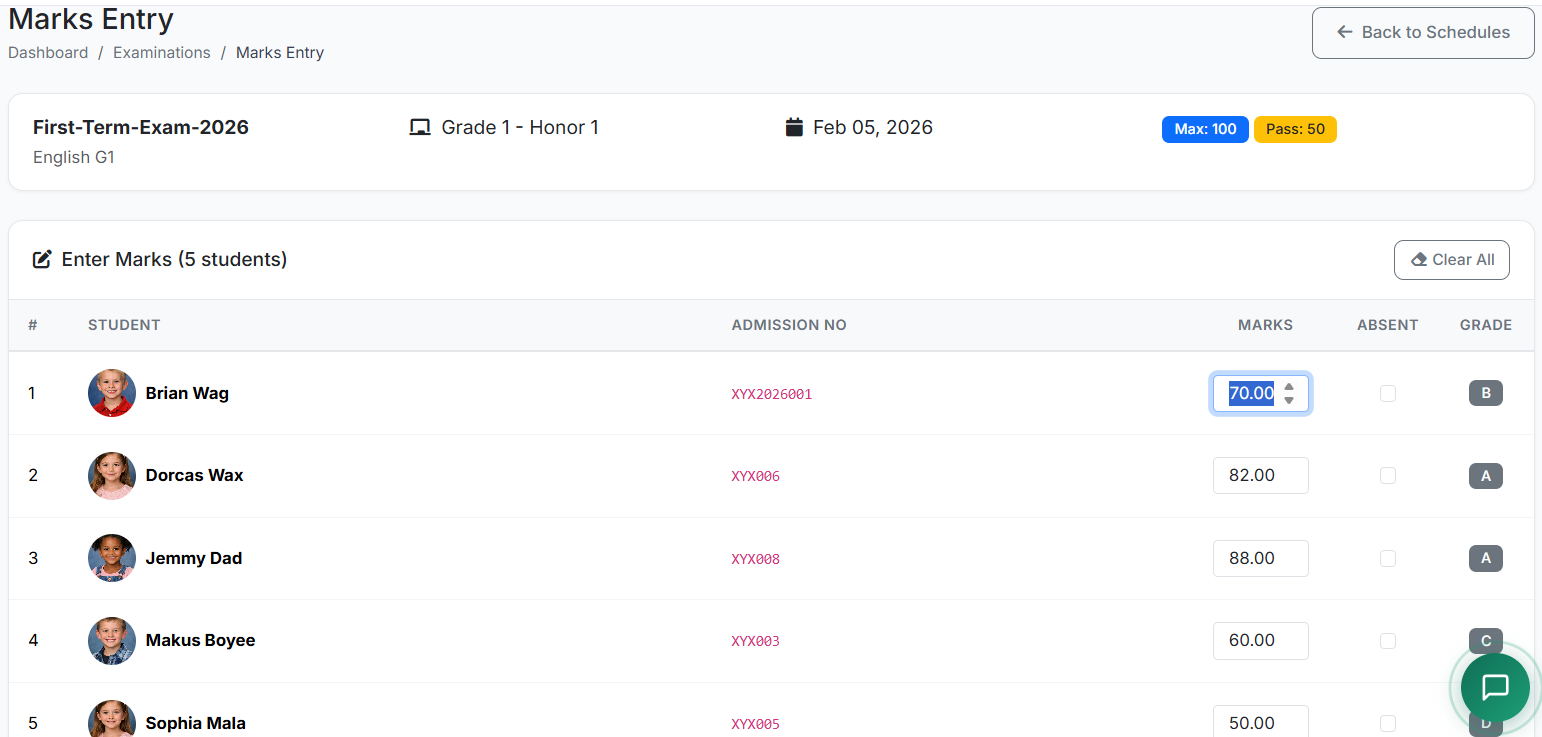
For each student, enter the marks obtained in the provided input field
As soon as marks are entered, the grade is calculated automatically based on the assigned grade scale
Proceed to the next student and repeat
For each student, enter the marks obtained in the provided input field
As soon as marks are entered, the grade is calculated automatically based on the assigned grade scale
Proceed to the next student and repeat
💾 Saving Exam Results
Depending on the system configuration, results may be saved:
Automatically as marks are entered
By clicking Save Results
By using Save and Next to move directly to the next subject
📌 Important Note About Exam Scores
"The exam score represents the total score for a particular subject per term. For example, the combined total of exams and tests during a school term may be 70 marks (70%), while homework contributes 30 marks (30%), making a total of 100 marks (100%).
The score entered by the teacher as the exam score is the final combined score from both exams/tests and homework — that is, the aggregate score for the term in that subject. This total is then calculated by the system into a grade of A, B, C, D, or E, depending on the grading system used."
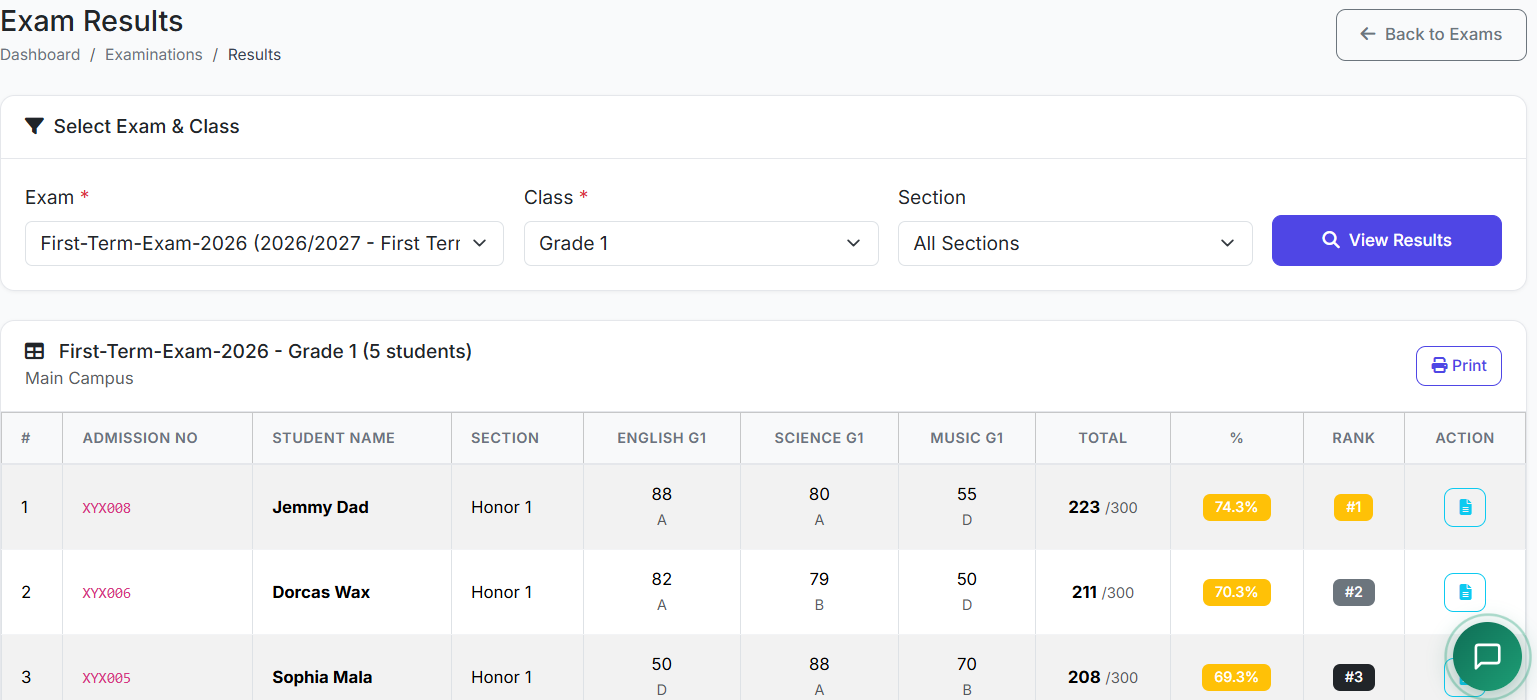
👥 Viewing by Class
Results can be viewed by class by selecting the appropriate filters.
This displays all students' marks in a tabular format, which can be printed or exported if needed.
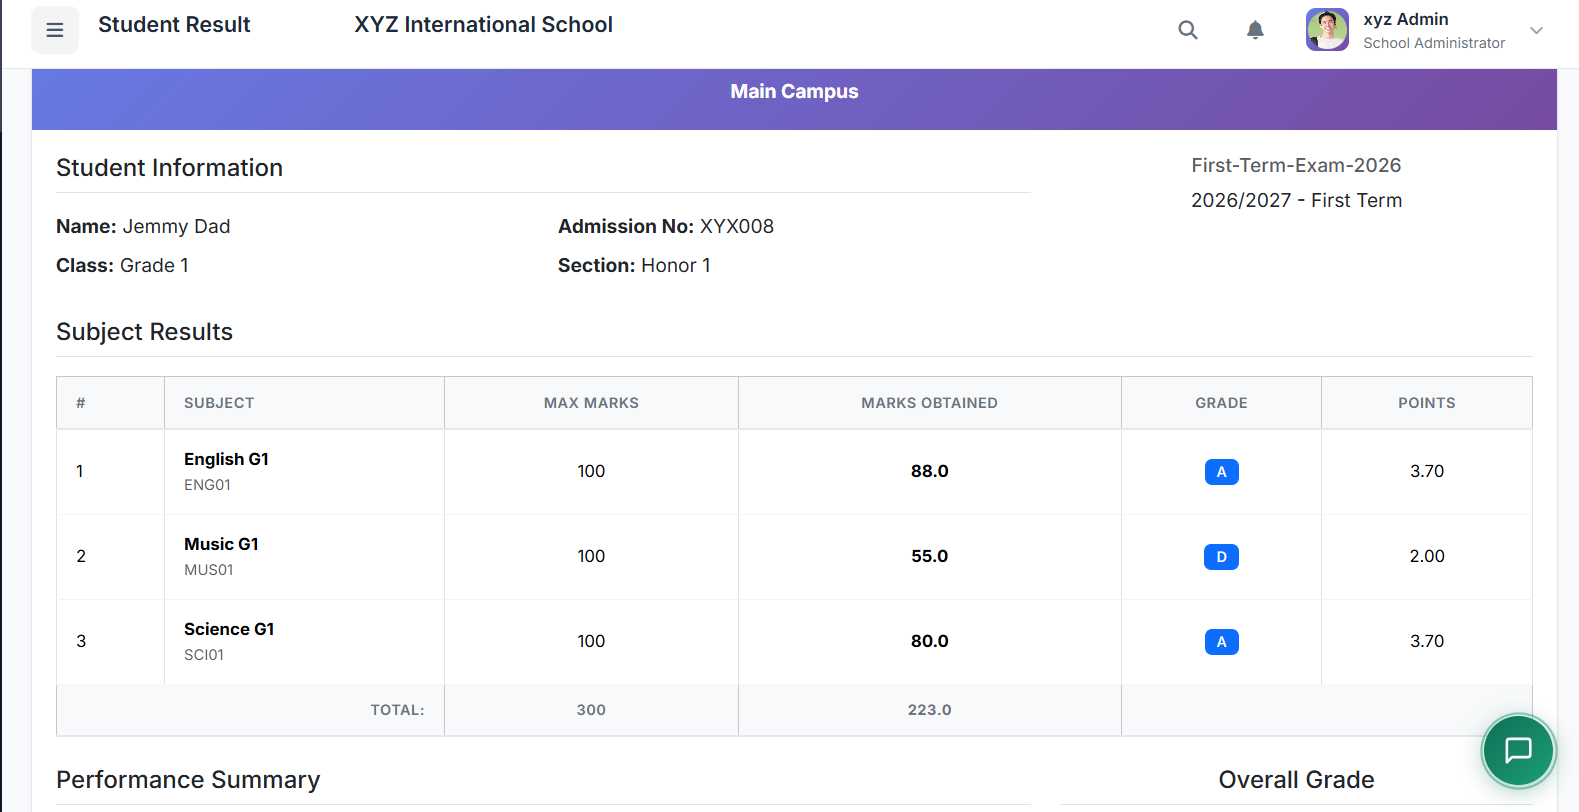
👤 Viewing Individual Student Results
To view individual results:
Click the View Result icon
View a complete summary of that student's examination performance
From here, a student report card can also be printed

📢 Publishing Results
Once all marks have been entered and reviewed:
Publishing makes the results visible to students and parents, and allows report cards to be generated.
⚠️ Important: It's important to double-check all entries before publishing to avoid errors.
✏️ Editing Results and Audit Control
If corrections are needed:
Load the same exam, class, and subject
Make the necessary changes
Save again
| Feature | Description |
|---|---|
| Audit Log | All changes are logged for audit purposes |
| Edit Restrictions | In some cases, editing may be restricted after results have been published |
🧮 Grade Calculation Explanation
Grades are calculated automatically using:
The student's marks
The maximum score
The configured grade scale
Example: A student who scores 78 out of 100 gets 78%, which may translate to a B+ grade, depending on the grading rules.
📊 Result Statistics Overview
The system also provides result statistics, including:
| Statistic | Description |
|---|---|
| Class average | Average score across all students |
| Highest score | Top performer |
| Lowest score | Bottom score |
| Pass rate | Percentage of students who passed |
| Grade distribution | Breakdown of grades (A, B, C, etc.) |
These insights help teachers and administrators evaluate overall class performance. This will be discussed further under the Reports module.
✅ Best Practices
Practice Reason Enter results promptly after marking Ensures timely reporting Review carefully before publishing Prevents errors in official records Handle absences and exemptions consistently Maintains fairness and accuracy Review grade distributions for unusual patterns Identifies potential grading issues
| Practice | Reason |
|---|---|
| Enter results promptly after marking | Ensures timely reporting |
| Review carefully before publishing | Prevents errors in official records |
| Handle absences and exemptions consistently | Maintains fairness and accuracy |
| Review grade distributions for unusual patterns | Identifies potential grading issues |
🏁 Closing
That concludes our demonstration of the Exam Results module.
This module ensures accurate grading, transparent reporting, and reliable academic records.