📝 Module Overview
In this tutorial, we'll be Creating and managing Exams by integrating exam types, academic years, classes, and subjects into a structured assessment plan.
The Examinations module is where you create and manage the actual exams taken by students. It brings together all pre-configured components—Exam Types, Academic Years, Terms, Classes, and Subjects—into a complete assessment structure.
🧭 How to Access
Navigate to: Examinations → Exams
📐 Understanding the Exam Hierarchy
Exams are structured in a clear hierarchy for consistency:
Academic Year → Term → Exam Type → Classes → Subjects
This ensures accurate organization and result computation.
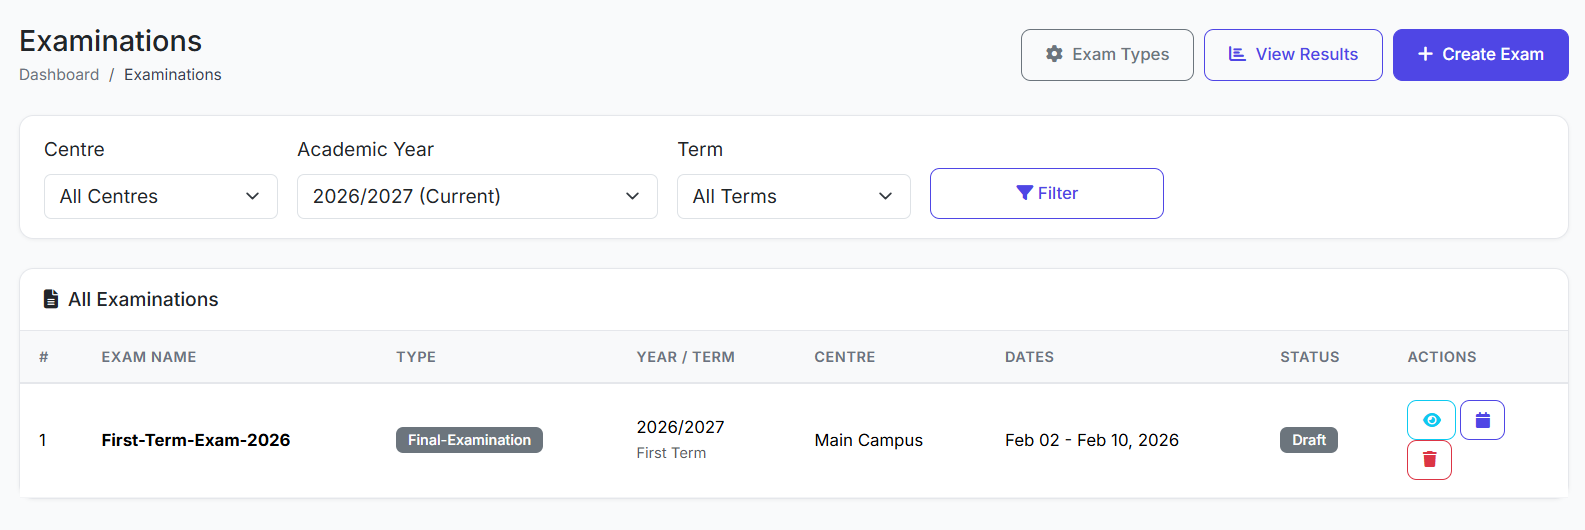
📋 Examinations List Overview
The main page lists all created exams. Key columns include:
| Column | Description |
|---|---|
| Exam Name | The title of the examination (e.g., "First Term Exam 2025"). |
| Exam Type | Category (e.g., Mid-Term, Final). |
| Academic Term | The term within the academic year. |
| Start & End Dates | The overall date range for the exam period. |
| Status | Upcoming, In Progress, Completed, or Cancelled. |
| Actions | Edit, Manage Schedule, View Results, Delete. |
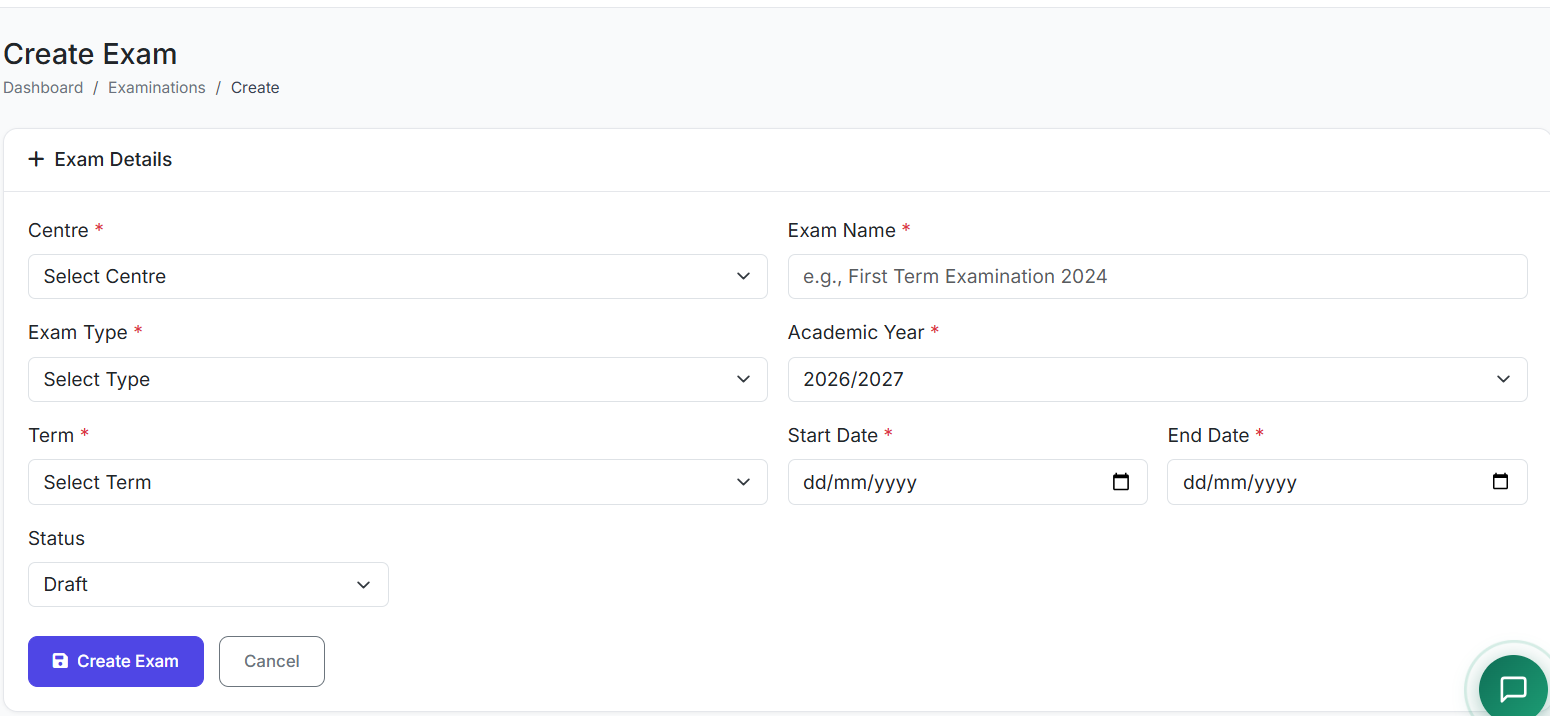
➕ Creating a New Examination
Step 1: Open the Form
Click the Add Examination button.
Step 2: Fill in Basic Information
Exam Name: (e.g.,
First Term Exam 2025)Exam Type: Select from pre-configured types (e.g., Final Exam).
Academic Year & Term: Select the relevant year and term.
Grade Scale: Choose the grading system to be applied.
Start Date & End Date: Set the overall date range for the exam period.
Description: (Optional) Add internal notes.
Step 3: Select Participating Classes
Select the Classes (e.g., Grade 5, Grade 6) that will take this exam.
All sections within a selected class are automatically included.
Step 4: Select Subjects (Optional)
If you select no subjects: The system will include all subjects assigned to the chosen classes.
To limit the exam: Manually select specific subjects.
Step 5: Save
Click Create Examination.
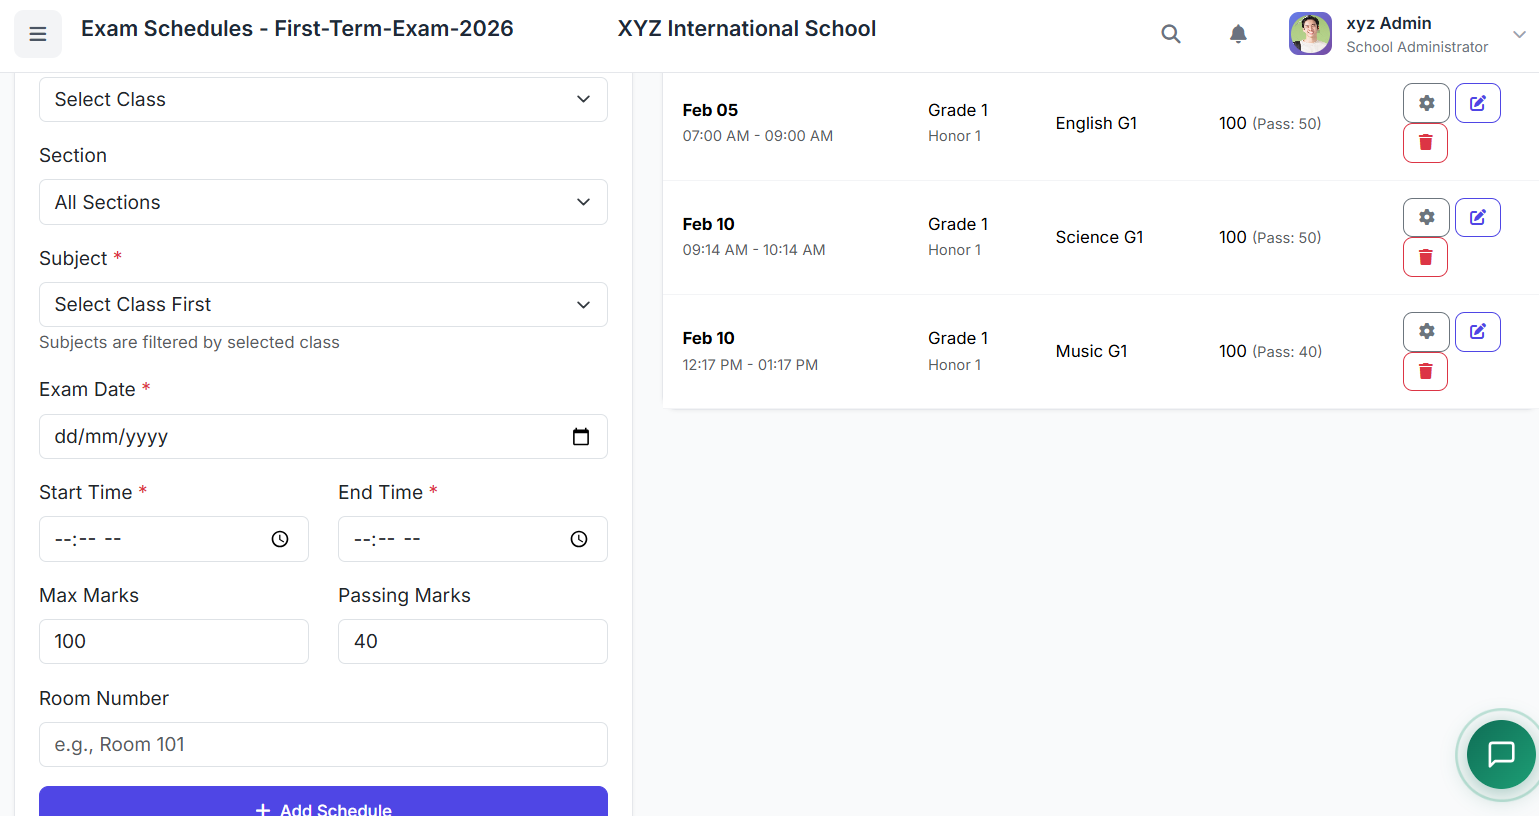
📅 Managing the Exam Schedule
Once the exam is created, the next critical step is setting the detailed timetable.
On the exam list, click Manage or Schedule.
For each subject, define:
Exam Date
Start Time & End Time
Room/Venue (Optional)
Save the schedule.

This creates the specific timetable that teachers and students will follow.
⚙️ Understanding Exam Status
The system automatically updates an exam's status based on dates, but it can also be manually managed:
| Status | Description |
|---|---|
| Upcoming | The exam's start date is in the future. |
| In Progress | Current date is within the exam's scheduled period. |
| Completed | The exam end date has passed. |
| Cancelled | Exam was called off (manual administrative action). |
✅ Best Practices
Plan in Advance: Create exams well ahead of the scheduled dates to allow time for scheduling and communication.
Set Realistic Durations: Ensure the exam time allocated per subject is appropriate.
Communicate Clearly: Once the schedule is set, publish and communicate it promptly to staff, students, and parents.
Preserve Data Integrity: Avoid deleting exams that already have recorded results. Instead, use status management (e.g., mark as Completed or Cancelled).
The Examinations module provides a robust framework for planning, scheduling, and managing all school assessments, ensuring they are well-organized and accurately tracked.
Next, we will demonstrate how to enter and manage exam results.