🏠 Part 1: Managing Rooms
Module Overview
In this tutorial, we'll learn how to configure individual rooms within hostels and allocate students to specific rooms and beds, managing capacity and occupancy in real-time.
Manage Rooms is where you define the living spaces inside each hostel. You specify room numbers, types, capacity, and amenities, creating an inventory of available accommodation.
🧭 How to Access
Navigate to: Hostels → Manage Rooms
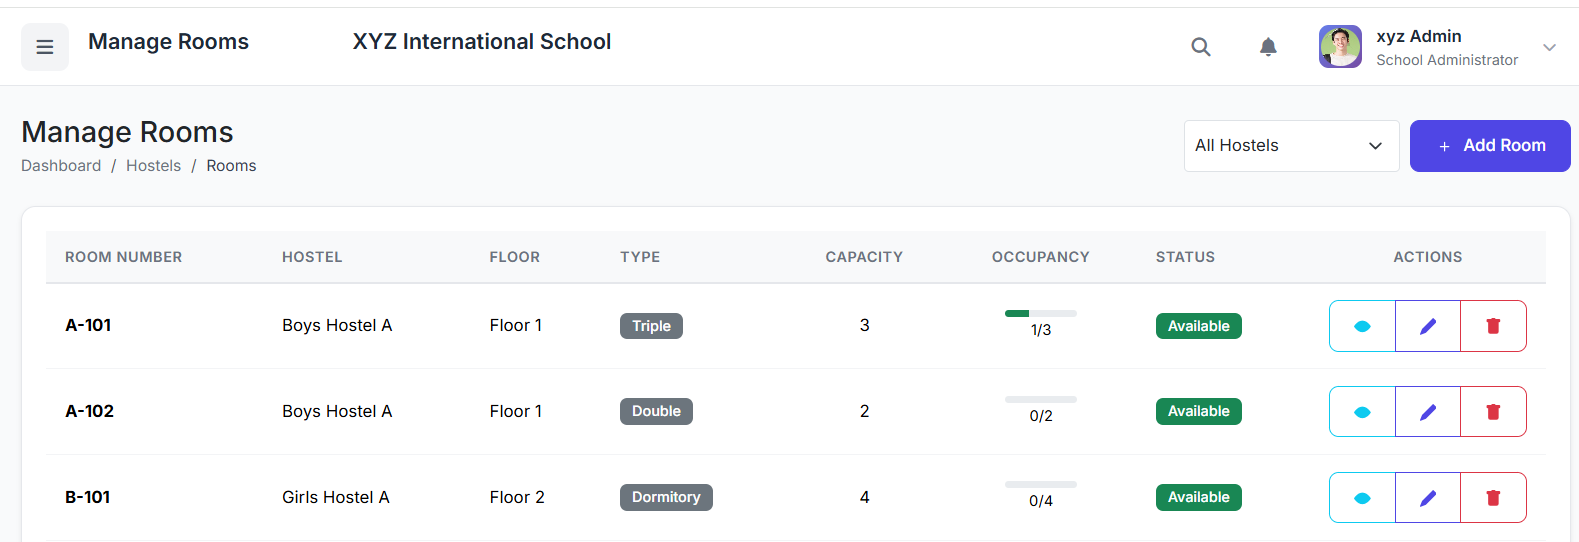
📋 Rooms List Page
View all rooms across all hostels. Key columns include:
Room Number (e.g., A-101)
Hostel (Parent building)
Floor
Room Type (Single, Double, Dormitory, etc.)
Capacity (Max beds)
Occupancy (Current/Max)
Status (Available, Occupied, Under Maintenance)
Actions (View, Edit, Delete)

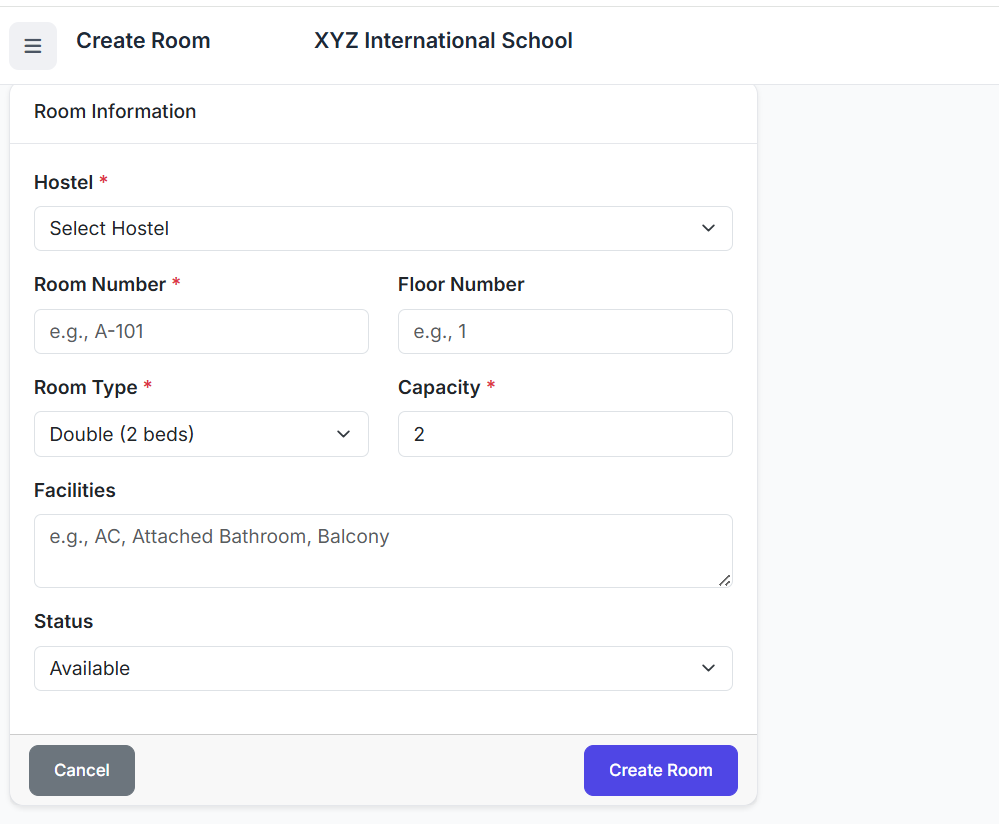
➕ Adding a New Room
Click Add Room.
Fill in the form:
Hostel: Select the parent hostel building.
Room Number: Assign a unique identifier.
Floor: (Optional) Specify the floor.
Room Type: Select Single, Double, Triple, Dormitory, etc.
Capacity: Set the maximum number of beds/occupants.
Facilities: (Optional) List amenities (AC, Attached Bath, Study Desk).
Status: Set to Available.
Click Create Room.
Result: The room is added to the hostel's inventory and is ready for student allocation.
👁️ Viewing Room Details
Click View on a room to see a detailed pop-up showing:
Full room specifications.
List of current occupants (students).
Bed-wise assignment (which student is in which bed).
Available bed count.
Room Allocations
Room Allocations is the process of assigning students to specific rooms and beds. It links a student to a hostel space for an academic year, often with an associated fee, and tracks their stay.
🧭 How to Access
Navigate to: Hostels → Room Allocations
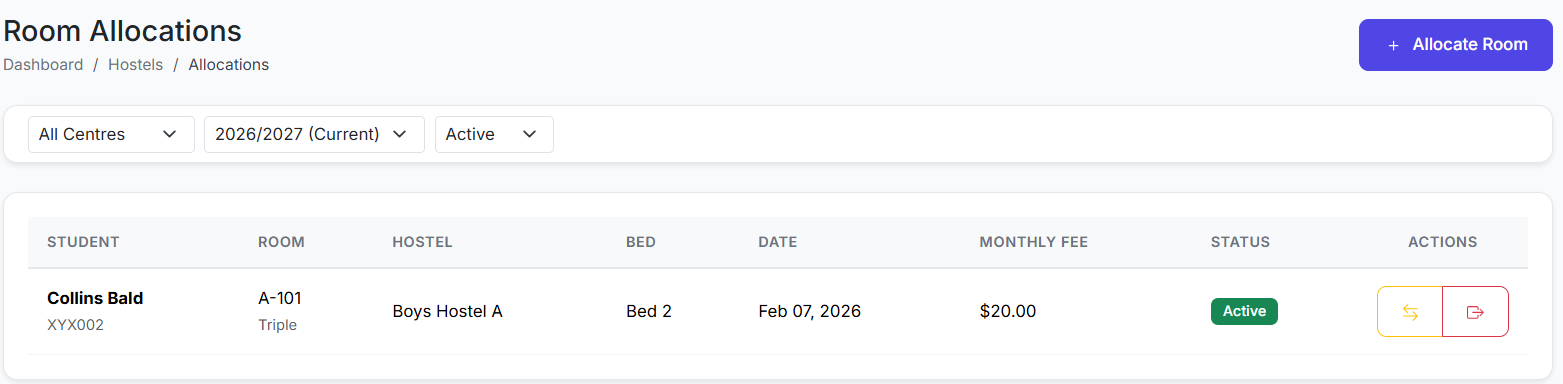
📋 Allocations List Page
View all active and historical assignments. Columns show:
Student Name
Room & Hostel
Bed Number
Allocation Date
Monthly Fee
Status (Active, Vacated, Suspended)
Actions (Transfer, Checkout)
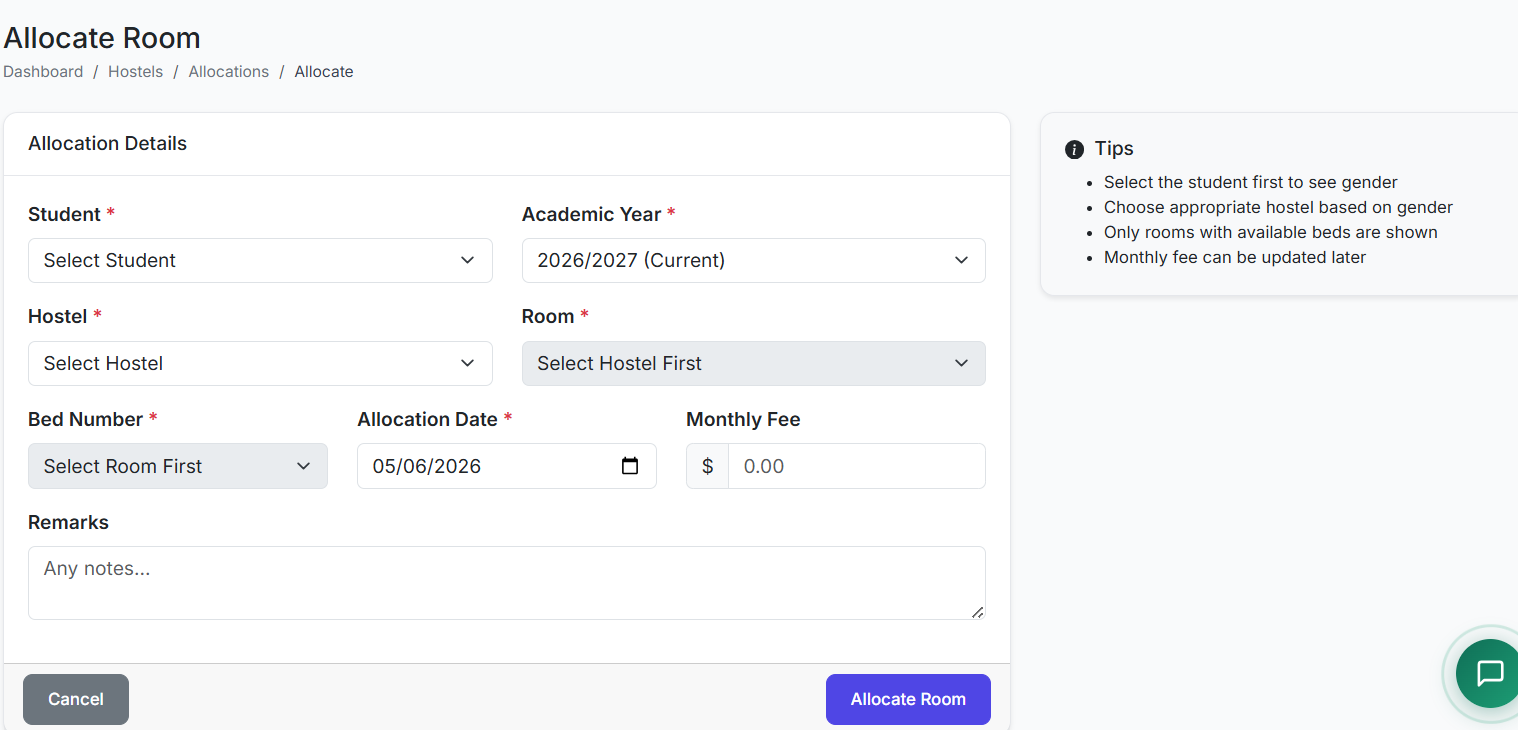
➕ Allocating a Student to a Room
Click Allocate Room.
Fill in the form:
Student: Select the student.
Academic Year: Choose the relevant year.
Hostel: Select a hostel → the system filters to show only its available rooms.
Room: Select a room → the system shows only its available beds.
Bed Number: Choose the specific bed.
Allocation Date: Set the move-in date.
Monthly Fee: (Optional) Enter the hostel charge.
Click Allocate Room.
Result: The student is assigned, the room's occupancy increases, and the bed is marked as occupied.
🔄 Managing Existing Allocations
| Action | Process | Outcome |
|---|---|---|
| Transfer | Click Transfer, select new Hostel/Room/Bed. | Old bed is freed; new allocation is created with updated details. |
| Checkout | Click Checkout, confirm. | Allocation status changes to Vacated. Room/bed becomes available. Fee charges stop (if automated). |
✅ Best Practices
Plan Capacity: Set room Capacity accurately during setup to prevent over-allocation.
Use Room Types: Correct Room Type classification helps in filtering and reporting (e.g., finding all available "Single" rooms).
Prevent Double-Booking: Rely on the system's automatic filtering of available rooms/beds during allocation to avoid errors.
Timely Checkouts: Process checkouts promptly when a student leaves to free up space and stop fee accrual.
Fee Integration: Ensure the Monthly Fee entered during allocation syncs correctly with the Finance module for automated billing.
The Manage Rooms and Room Allocations features provide precise control over your hostel's physical space and occupancy. Together, they ensure efficient use of resources, accurate tracking of residents, and seamless integration with billing systems.
Next, we will explore Hostel Fee Management and Reporting.