Introduction
Here we'll look at how to configure your School Profile settings in SSMS.
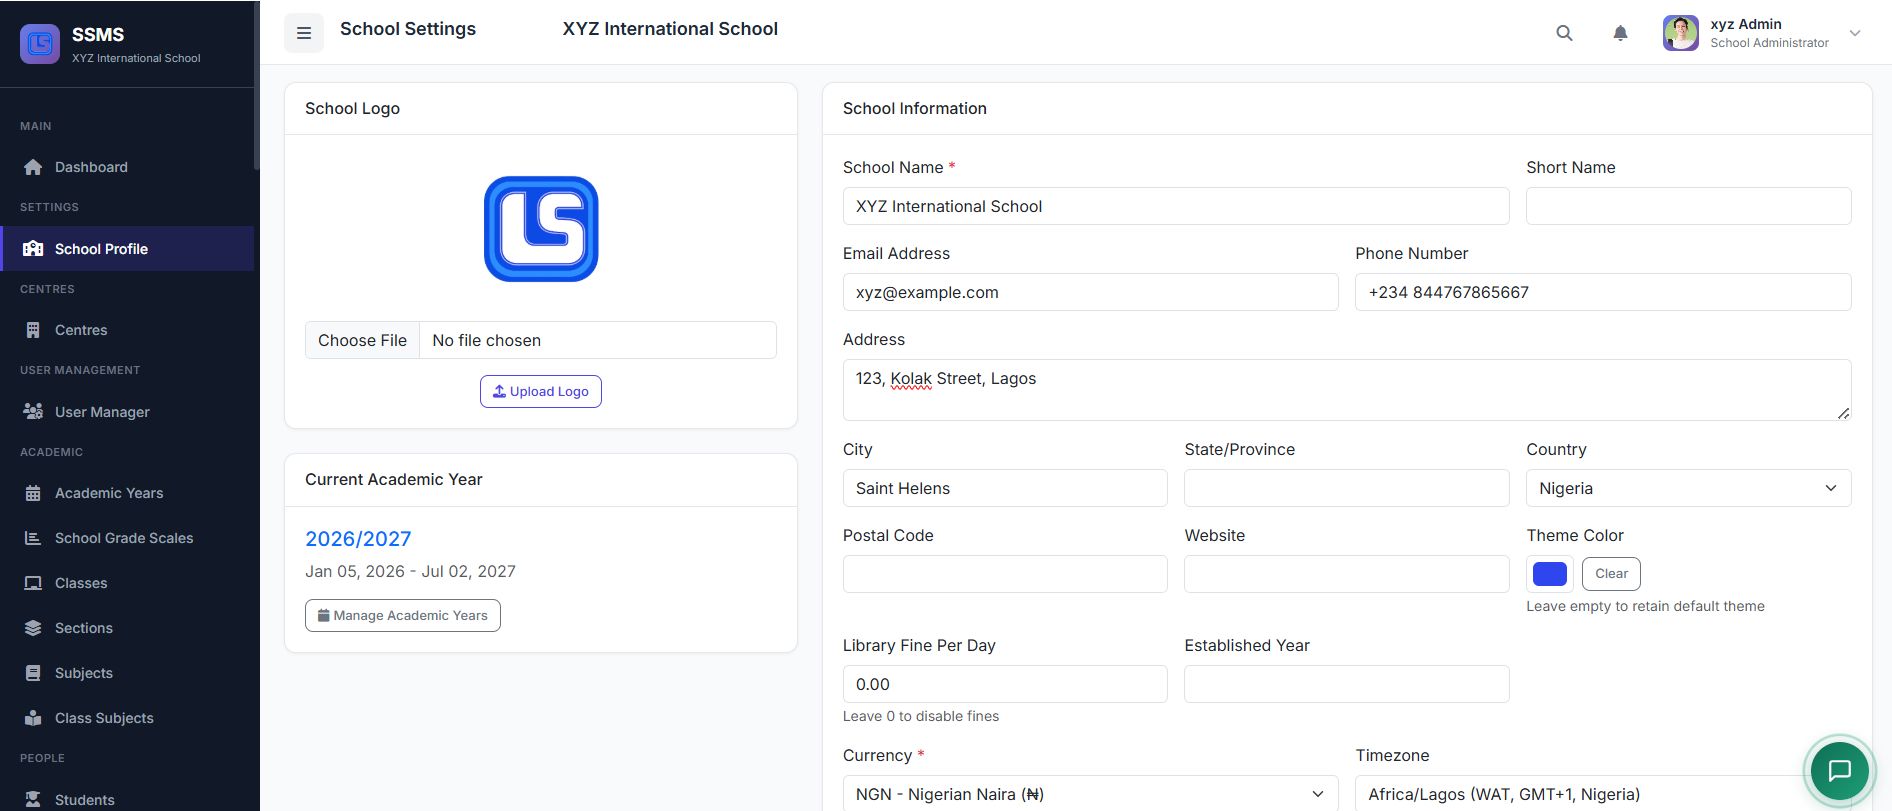
The School Profile section allows administrators to manage essential school information that appears on reports, certificates, invoices, and across the entire system.
Important: This is what every school administrator needs to do first — immediately after logging into their portal.
📍 Accessing School Profile Settings
To access the School Profile page:
Click on Settings from the sidebar menu
Then select School Profile
The School Profile page will load, displaying your school's current information.
🏫 School Profile Overview
This page contains all the basic, branding, and regional information related to your school.
Keeping this information accurate ensures consistency across all official documents generated by the system.
Note: This operation is limited to School Admin only.

📝 Basic School Information
In this section, you can configure:
School Name – The official name used across the system
School Code (Short Name) – An optional unique identifier
Email & Phone Number – Primary contact details
Website – If applicable
Physical Address – City, state/province, country, and postal code
Fields marked as required must be filled before saving changes.
🎨 Branding Settings
Here, you can:
Upload your School Logo – Appears on reports, certificates, and ID cards
Select a Theme Color – Defines the primary look and feel of the system interface
Using your school's branding helps create a professional and consistent identity.
🌍 Regional Settings
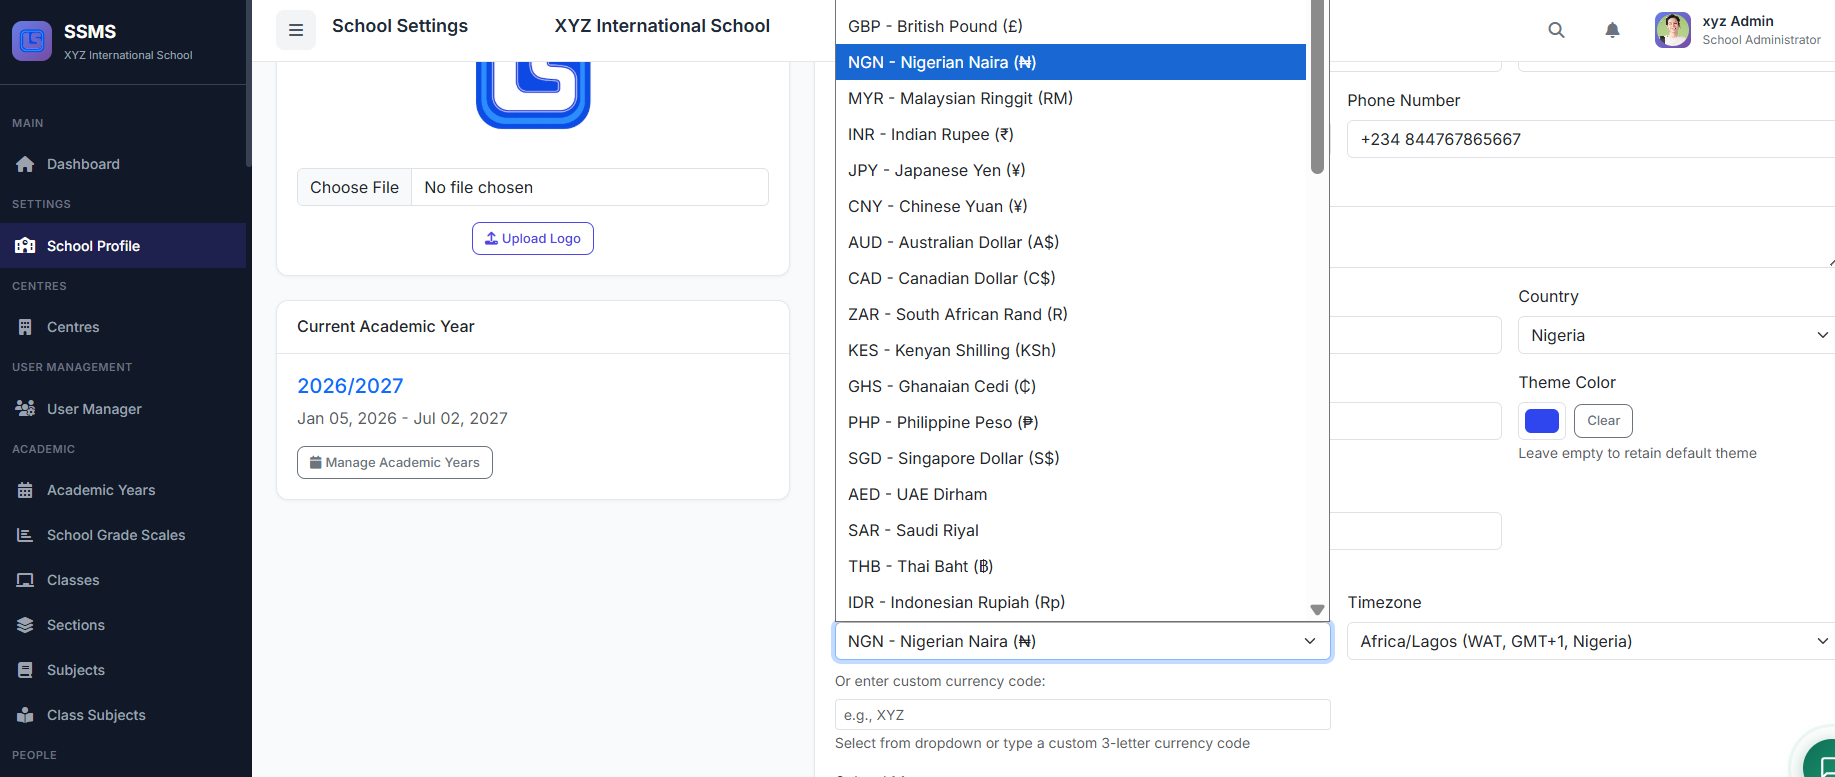
This section controls how dates and financial information are displayed.
You can configure:
| Setting | Description |
|---|---|
| Default Currency | Applied across all financial transactions. Choose the currency for your school/country. |
| Date Format | Set your preferred date display format |
| Timezone | Ensures accurate timestamps across the system |
💡 Pro tip: If your country's currency or timezone is not available in the lists, please let us know — we'll add them.
For currency, you can also type a custom 3-letter currency code for your country.
✏️ Editing the School Profile
To update your school profile:
Enter the necessary fields
Click Save Changes to apply the updates
All changes take effect immediately across the system.
🖼️ Uploading the School Logo
To upload or change your school logo:
Click Choose File or Upload in the logo section
Select an image file from your computer
Wait for the upload to complete
Preview the logo to confirm
Click Save Changes to apply
For best results: Use a high-quality image, preferably with a transparent background.
✅ Best Practices
Keep these tips in mind:
Use a clear, high-quality school logo (max: 500 × 500 pixels)
Keep the school name consistent across all documents
Always ensure contact information is up to date
Choose a theme color that matches your school's branding
Following these tips helps maintain a professional and consistent system appearance.
Note: The current academic year will be discussed later as we progress in the tutorial.
🏁 Closing
That's how you configure the School Profile settings in SSMS.