📚 Part 2: Library Transactions
Module Overview
In this tutorial, we'll be managing the borrowing cycle (issue, return, renew) and handling digital content like e-books and online materials within the Library module.
Library Transactions is the circulation desk of your digital library. It tracks every book's journey—from issuance and renewal to return and overdue management—automating fines and maintaining clear records.
🧭 How to Access
Navigate to: Library → Transactions
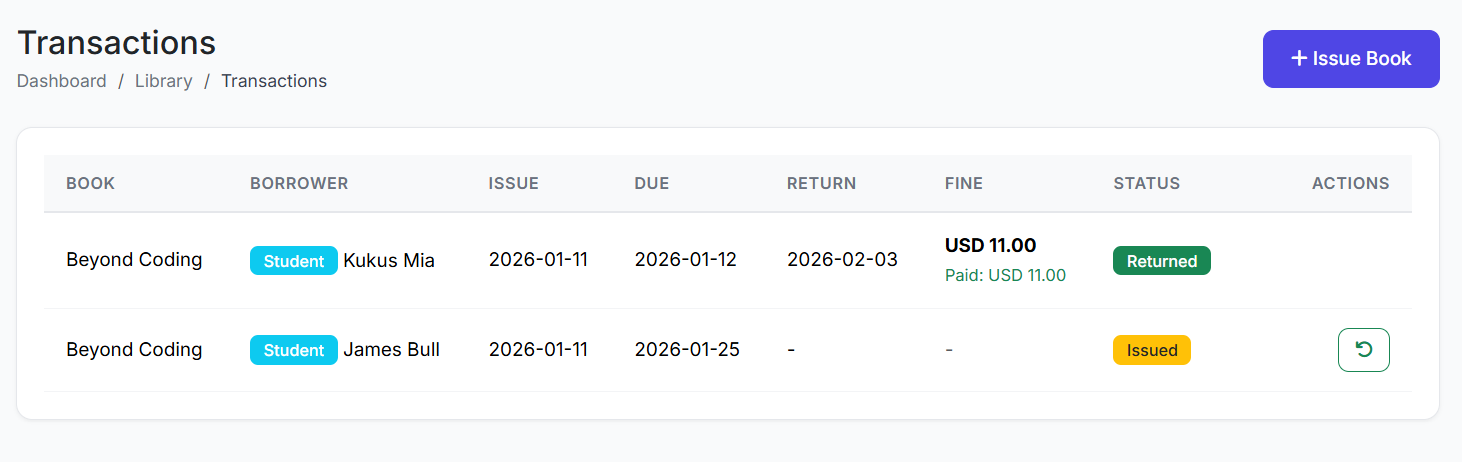
📋 Transactions List Page
The main table shows all borrowing activity. Key columns include:
Transaction ID
Book Title
Borrower (Student/Staff)
Issue Date
Due Date
Return Date
Fine Amount (if any)
Status (Issued, Returned, Overdue)
Actions (Return, Renew, View)
🔄 Core Transaction Actions
1. Issuing a Book
Click Issue Book.
Search and Select the Book.
Select the Borrower (search by student/staff name).
Set the Due Date (the Issue Date defaults to today).
Click Issue.
Result: The book's Available Copies count decreases by one, and the transaction appears in the list with status "Issued".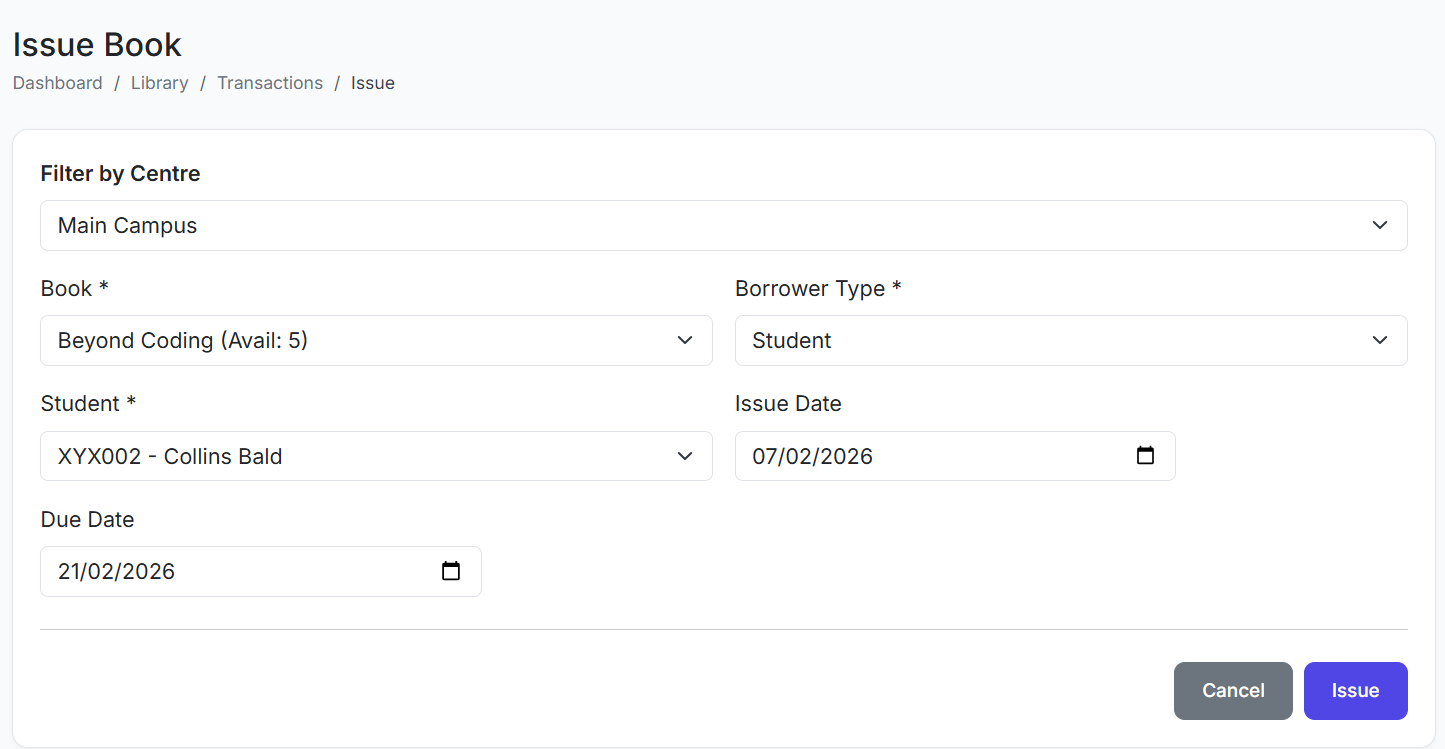
2. Returning a Book
Find the "Issued" transaction for the book.
Click Return.
The Return Date defaults to today.
The system automatically checks for overdue days and calculates any fine.
Confirm.
Result: Status changes to "Returned", the book's Available Copies increase, and any fine is recorded.
3. Renewing a Book
For an "Issued" book, click Renew.
The system sets a new Due Date (typically extending from the original due date or current date, based on your policy).
Confirm.
Result: The due date is updated, allowing the borrower more time. A record of the renewal is often kept in the transaction history.
⚠️ Overdue Management & Fines
Automatic Highlighting: The system flags transactions where the Due Date has passed but the book is not returned, marking them as "Overdue".
Fine Calculation: Fines are typically calculated as:
Fine = (Days Overdue) x (Fine Rate per Day)
A maximum fine cap can be configured.
Waiving Fines: Administrators can waive or adjust fines with a reason noted in the system.
Reports & Reminders: Use the Overdue Report to see all late books and send automated reminders to borrowers.
💻 Part 3: Digital Resources
Module Overview
Digital Resources extends your library's reach beyond physical books. It is a repository for e-books, PDFs, videos, documents, and external links that students and staff can access online.
🧭 How to Access
Navigate to: Library → Digital Resources
📋 Digital Resources List
View all digital assets. Columns typically show:
Resource Title
Type (e-book, Video, PDF, Link)
Category
Access Level (e.g., All Students, Teachers Only)
Downloads/Views
Status
Actions

➕ Adding a Digital Resource
Click Add Resource.
Fill in the form:
Title and Description.
Resource Type: Select E-book, Video, PDF, Document, or URL/Link.
Category: Assign for organization.
File/URL: Upload the file or paste the web link.
Access Level: Control who can view it (All, Specific Classes, Staff Only).
Status: Set to Active.
Click Add Resource.
Result: The resource becomes instantly available in the digital library for users with the correct access level to view or download.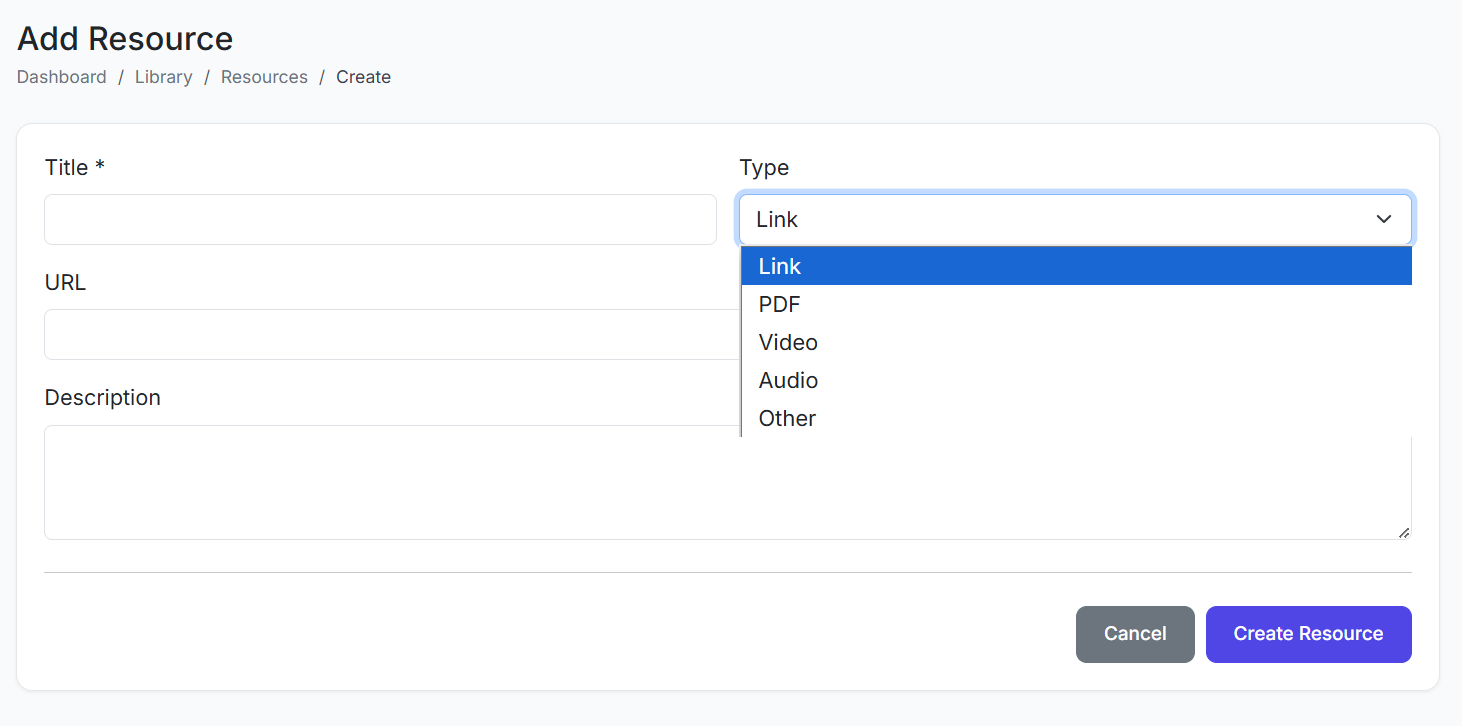
✅ Best Practices
For Transactions:
Clear Policies: Define and configure loan periods, renewal rules, and fine rates in the system settings before starting.
Regular Overdue Reviews: Run weekly overdue reports to proactively manage returns.
Communicate Rules: Ensure borrowers know due dates, renewal options, and fine policies.
For Digital Resources:
Organize with Categories: Use consistent categories (e.g., "Science Videos," "Past Exam Papers") for easy browsing.
Manage Access: Restrict sensitive materials (e.g., teacher guides) to appropriate access levels.
Check Links: Periodically verify that external URL links are still active.
Together, Library Transactions and Digital Resources create a fully functional, modern library system. They manage the complete lifecycle of physical materials and provide seamless access to digital learning content, all within a single, integrated platform.
This concludes our tour of the Library module. In the next tutorial, we will look at hostel module.